Configuration Guide
Configure the agent to connect with your Pohoda/Pamica installation
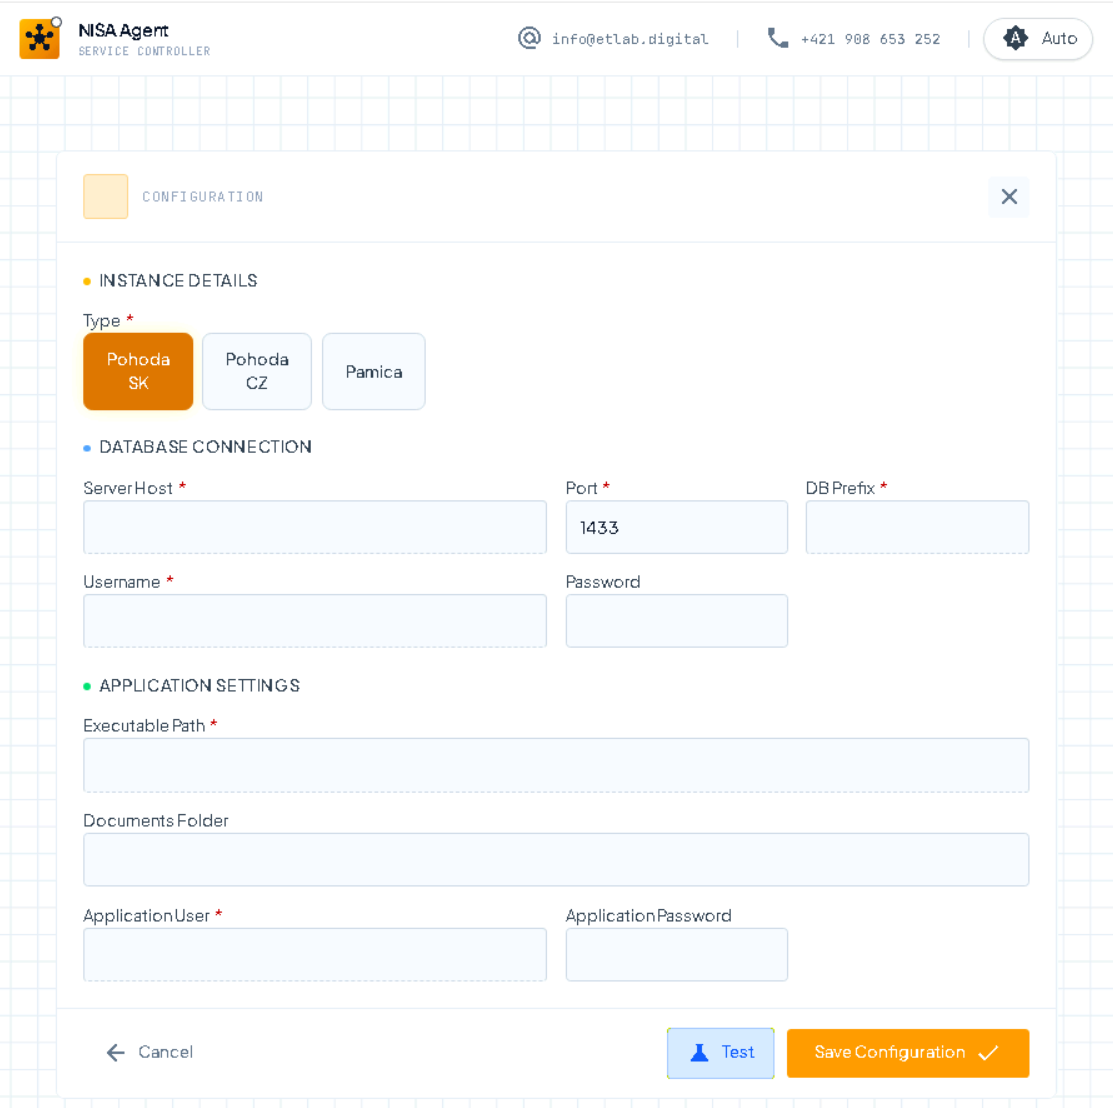
Configure the agent to connect with your Pohoda/Pamica installation. You'll need to specify the documents folder, executable location, and database credentials.
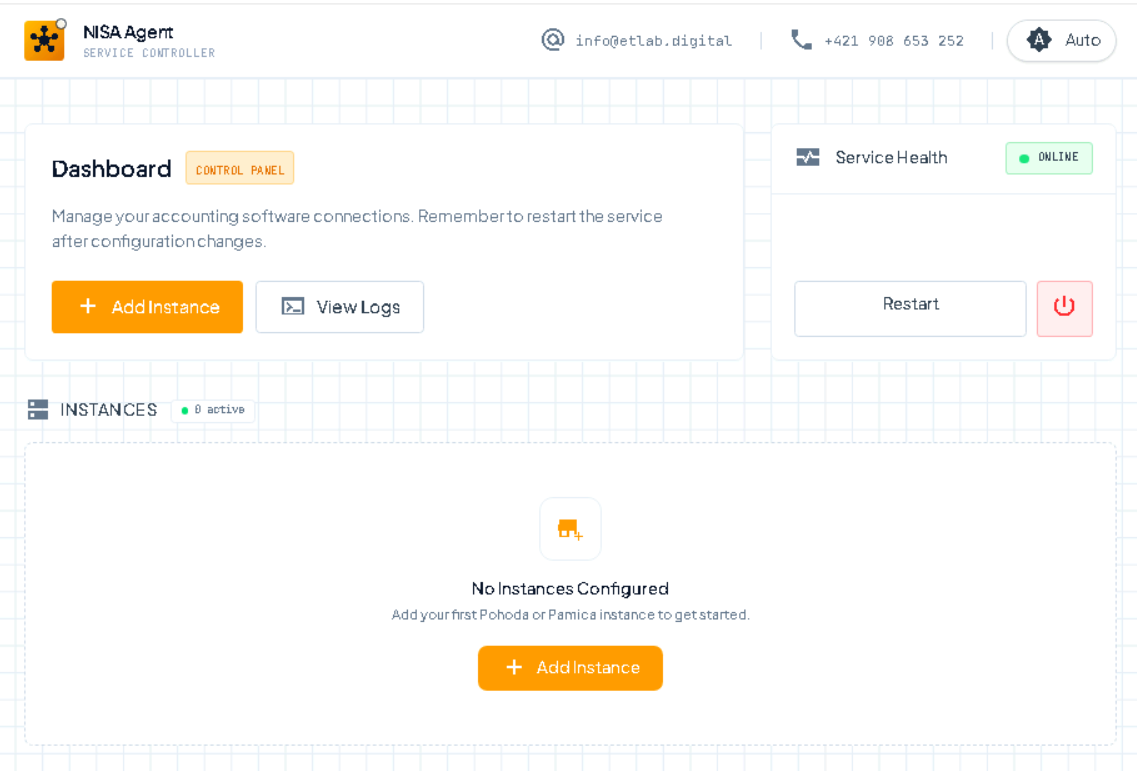
Service health displays the status of the Windows service. The user can restart, stop, install, or uninstall the service from this panel. The View Logs button shows the agent's log traces for monitoring activity and troubleshooting issues. The Add Instance button opens a form that the user needs to fill out in order to set up a new agent instance.
Controls: Service health status display, Restart/Stop/Install/Uninstall service buttons, View Logs button, Add Instance button
The user needs to choose the agent type (Slovak or Czech Pohoda, or Pamica). SQL connection information must be provided including server address, database name, and credentials. The user must specify where pohoda.exe is installed by providing the executable path. User credentials for pohoda.exe must be provided - these are the Windows user credentials that will have permission to execute the pohoda.exe binary in order to run XML imports. The Test button allows testing the configuration before saving.
Controls: Agent type selector (Slovak Pohoda/Czech Pohoda/Pamica), SQL server input, Database name field, Username/password fields, Pohoda.exe path input, Windows user credentials for XML execution, Test configuration button, Save/Cancel buttons
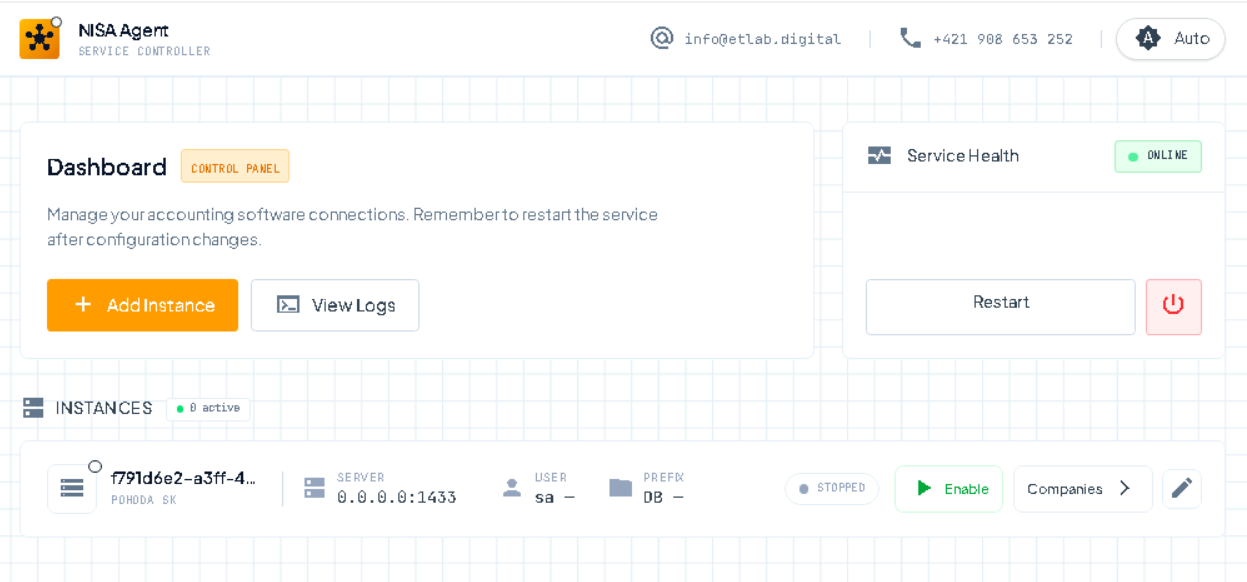
When one or more instances are defined, the user can enable or disable them. Only enabled instances will be available via the nisa.digital platform or via API. The user can edit an instance by clicking the Pencil button, which opens the configuration form. The Companies button displays all companies related to this specific instance.
Controls: Enable/Disable toggle for each instance, Edit (Pencil) button, Companies button, Instance status indicators

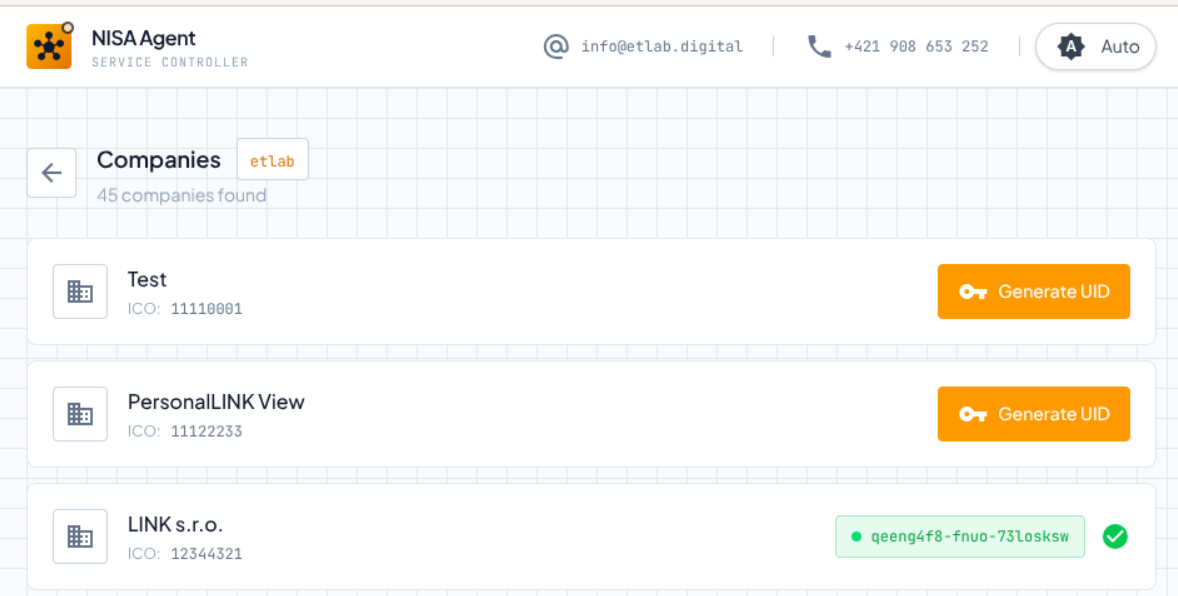
This view shows the companies list for a given instance. In order to access a given company via API or other partner connections, the user needs to generate a UID for that company. This UID is required to access the specific company through the API. The Companies button from the previous screen navigates to this view.
Controls: Company list display, Generate UID button for each company, UID display field, Copy UID button, Back to instances button